Installation
How To Install Your
Magnetic Speed Sensor
Requirements
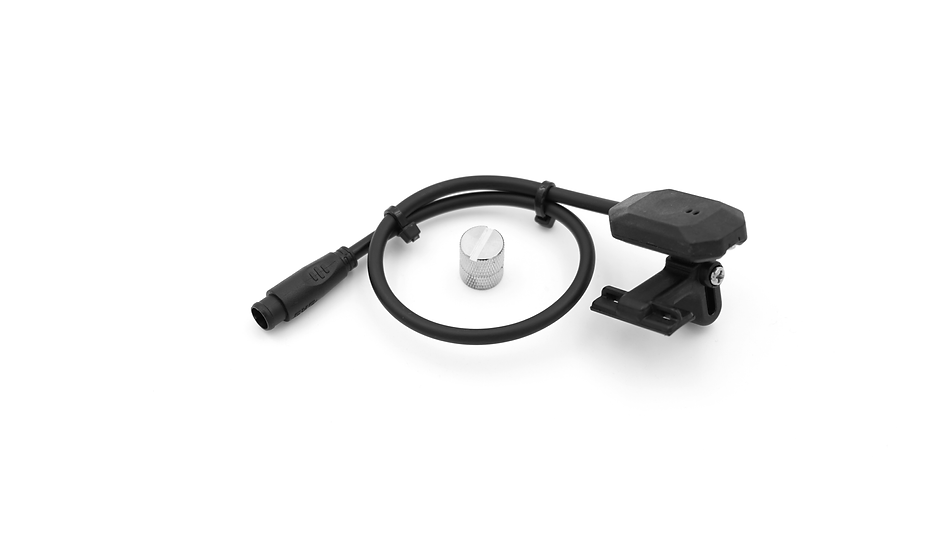
Speed Sensor for the X6 controller with the wheel magnet

2x cable ties
Operating Notice
Right and left sides correspond to the right and left handlebars, respectively.
Step 1 – Attach the speed sensor inside the chainstay with cable ties
Attach the speed sensor on the bottom left chainstay, with the cable facing the bottom bracket using cable ties. Do not place the speed sensor too close to the rear axle to ensure sufficient cable length to reach the controller.

Step 2 – Install magnet directly opposite the speed sensor on a wheel spoke
Screw the magnet onto the wheel spoke, aligning it with the sensor's groove to ensure accurate speed readings.
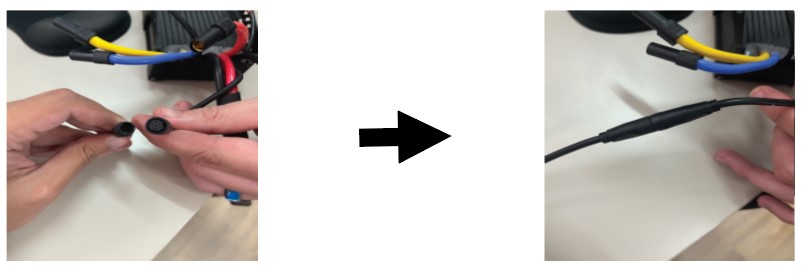
 Step 3 – Connect the speed sensor to the controller and power on the kit
The black male wire from the controller connects to the speed sensor. There are arrows for connection alignment on both the male and female sides.
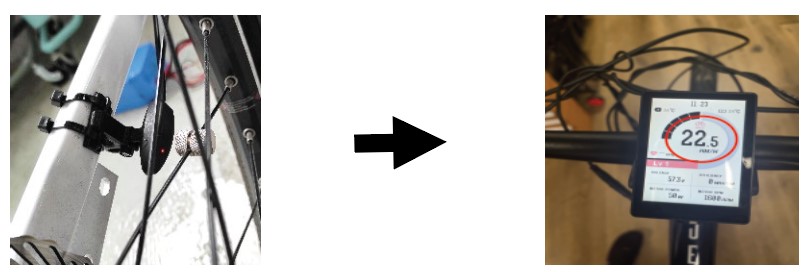
Step 4 – Test that the speed sensor is working as intended
After powering on and the magnet is correctly aligned, the speed sensor's red light should flash as the wheel spins, triggering a speed reading on the display.
Note that the speed sensor will show a blue light if the Ride Control app is connected. The BLE module sits inside the speed sensor so it is important to ensure your speed sensor is connected to be able to connect to the app as well.
Please contact us here if you need further assistance.